

🎓 Students
The Students module is the heart of academic record-keeping. Here you manage the personal, family, and academic information of every enrolled student at the institution. From this screen, you can query, register, and update any student's data quickly and securely.
Access: Side menu → People → Students
Permissions: Student management (full access) or Student query (read-only)
1. Student List
When you enter the module, a table with all registered students is displayed. The total count is shown next to the title (for example, 419 students).
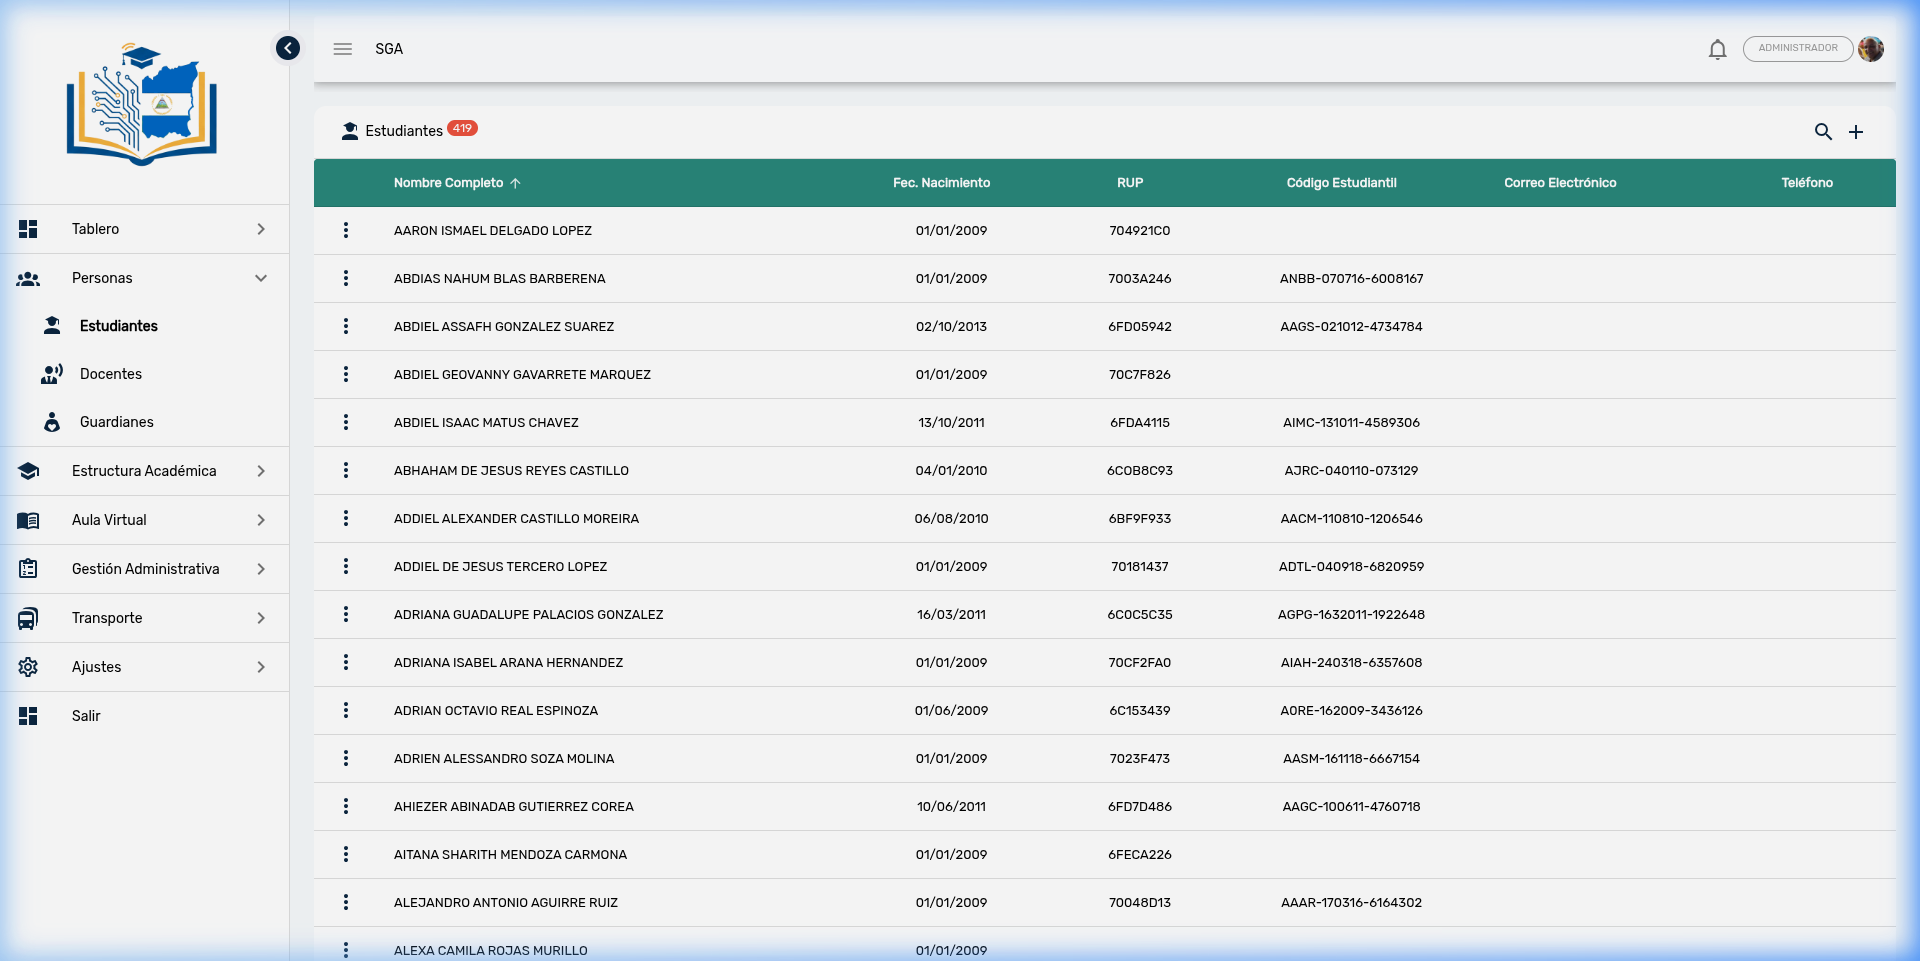
Visible columns
| Column | Description |
|---|---|
| Full Name | Student's first and last name, sortable alphabetically |
| Date of Birth | Date of birth in day/month/year format |
| RUP | Unique Participant Registry (code assigned by MINED) |
| Student Code | School's internal identifier |
| Student or family contact email | |
| Phone | Registered phone number |
Tip
You can click the Full Name header to sort the list from A to Z or vice versa. The arrow (↑) indicates the current sort order.
2. Student Search
To quickly locate a student, click the magnifying glass icon (🔍) in the upper right corner. A text field will appear where you can type any student data: name, last name, code, or RUP. The search is accent and case insensitive.
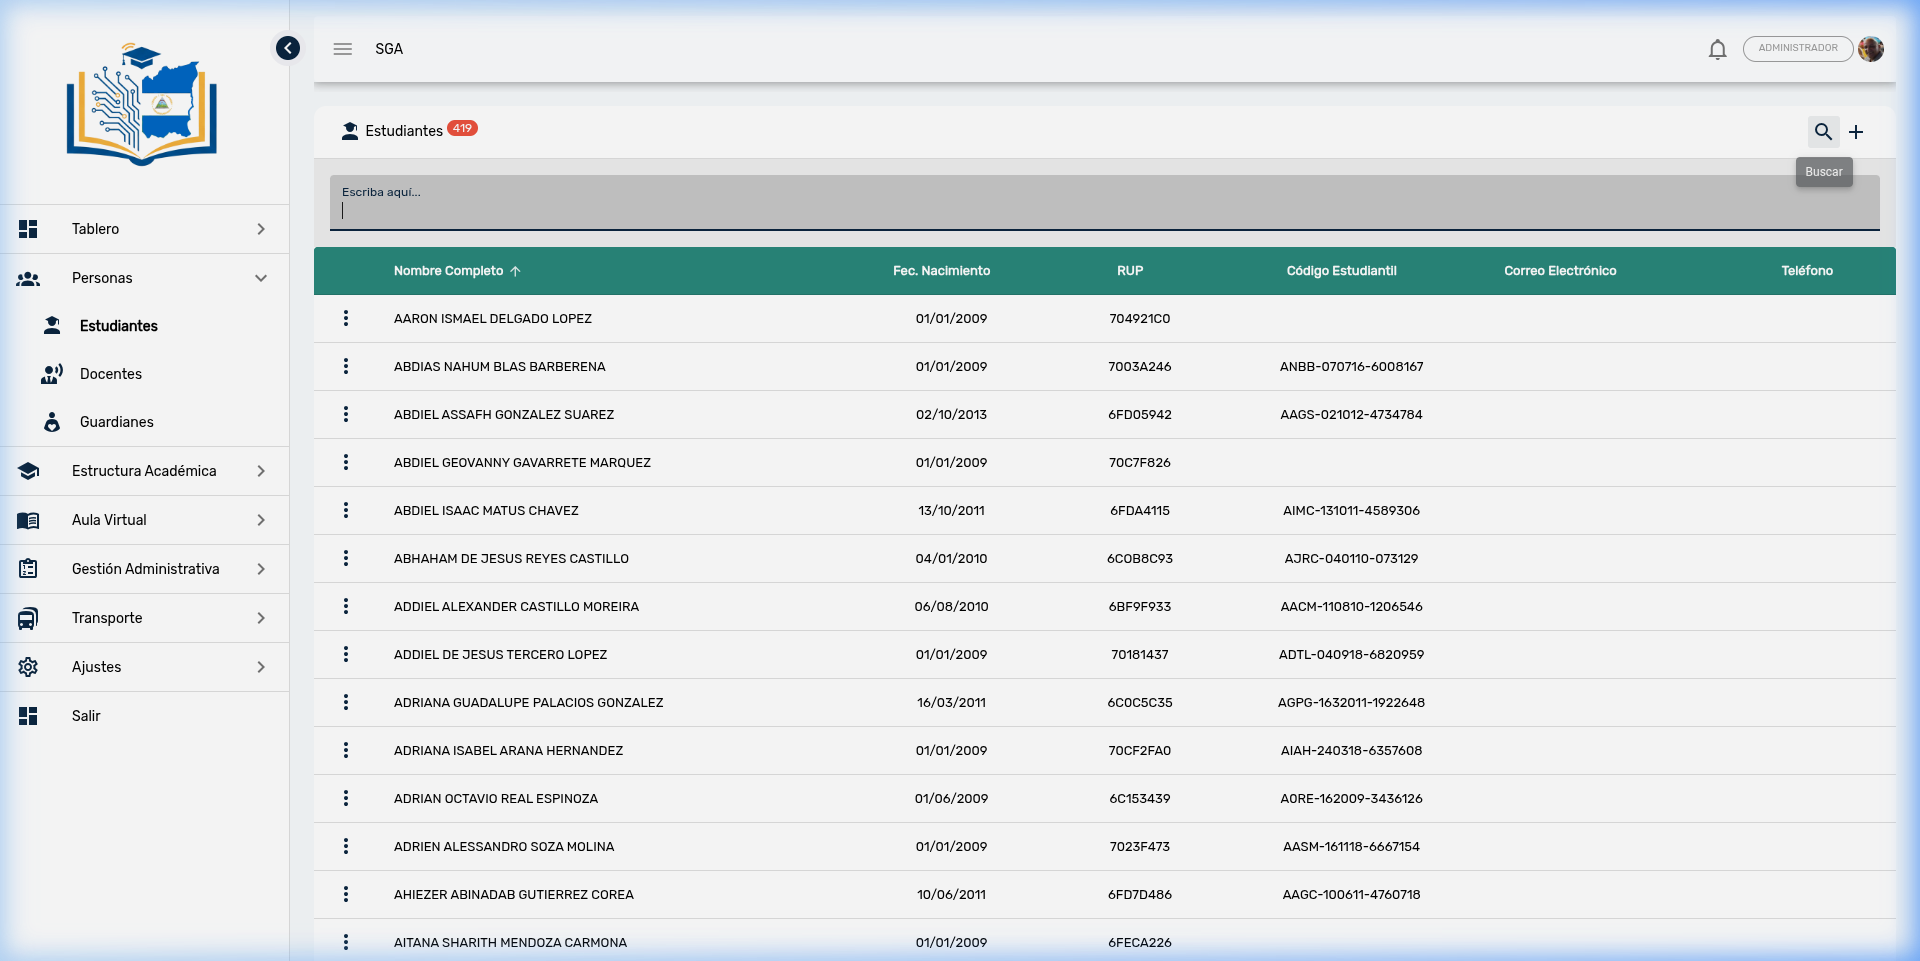
Steps to search:
- Click the magnifying glass icon (🔍)
- Type the student's name, last name, or code
- Press the Search button or the Enter key
- The table will filter to show only matching results
3. Actions per Student
Each student in the list has an actions menu represented by three vertical dots (⋮) at the beginning of their row. When clicked, the following options appear:
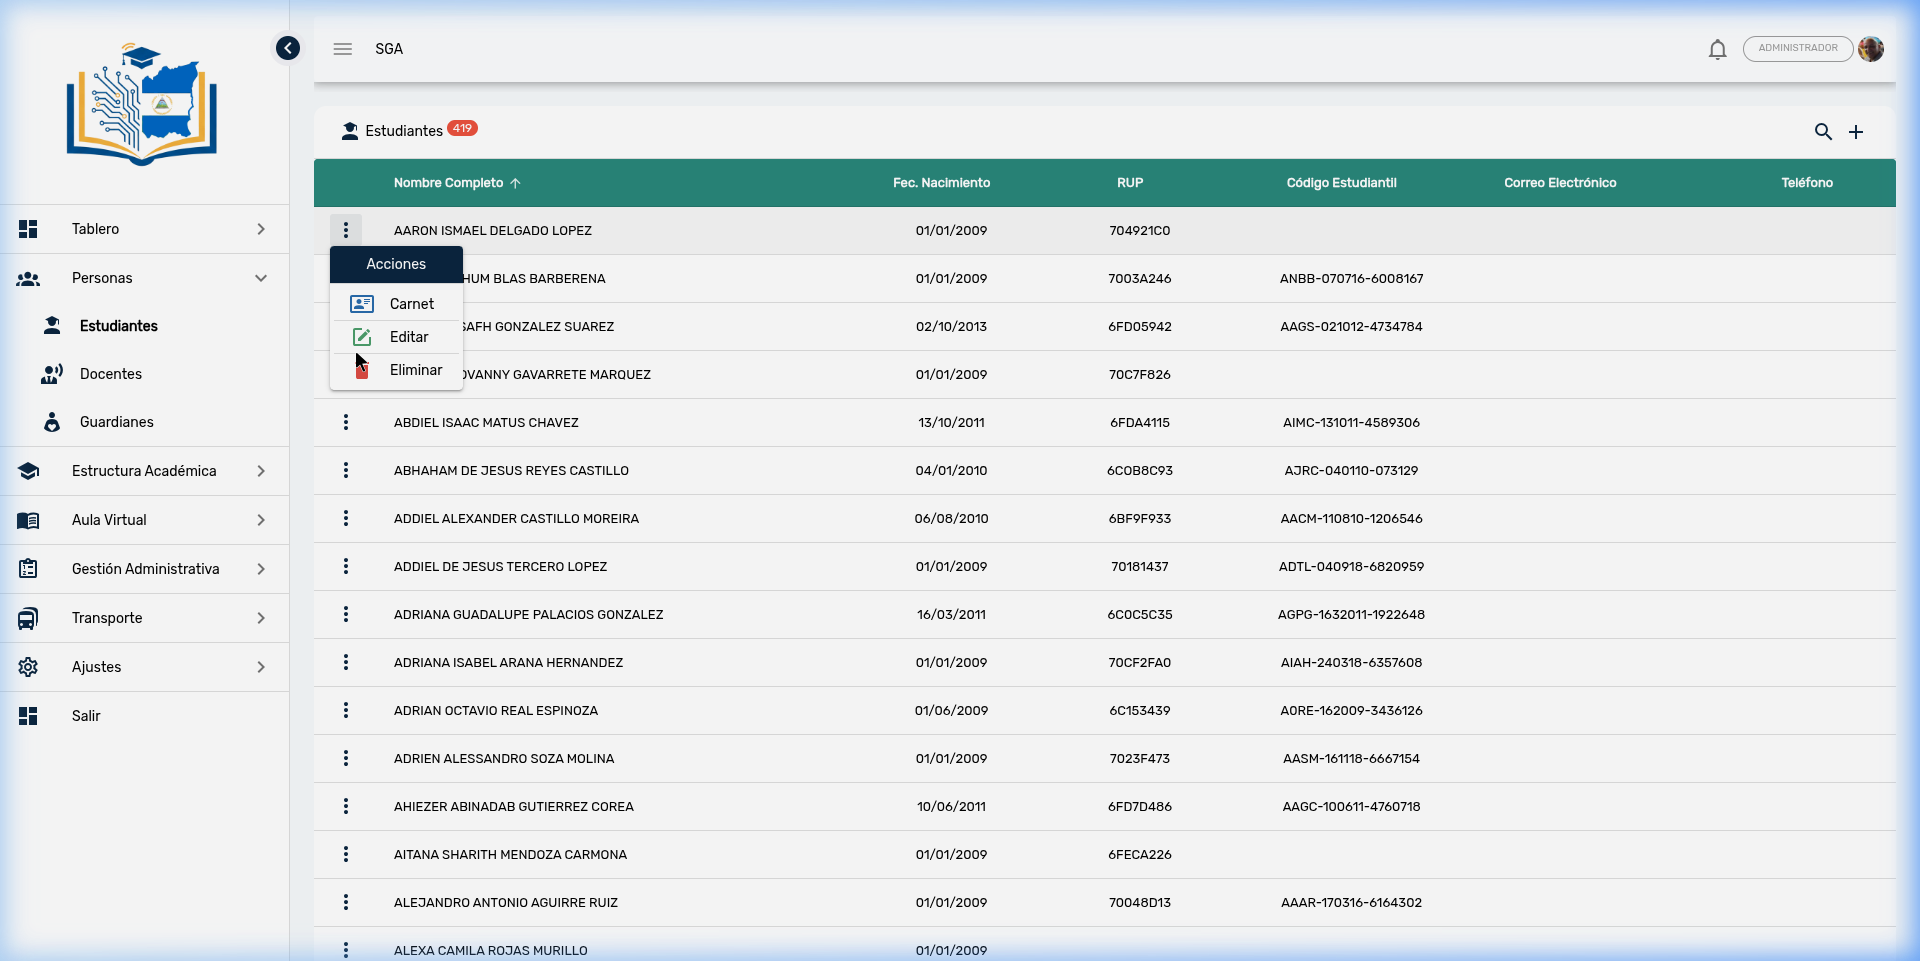
| Action | Icon | Description |
|---|---|---|
| ID Card | 🪪 | Generates the student credential with QR code for printing |
| Edit | ✏️ | Opens the student's complete profile for viewing or editing |
| Delete | 🗑️ | Deletes the student record (requires confirmation) |
Data protection
The system does not allow deleting a student who has enrollments, grades, attendance records, charges, or other associated records. If you try to delete one, you will receive an error message. Only students with no linked data can be deleted (for example, if they were registered by mistake).
4. Student Profile
When you select Edit, the student's complete profile opens, organized into 7 tabs that group all their information:
4.1 Tab: General Information
Contains the student's basic personal data.
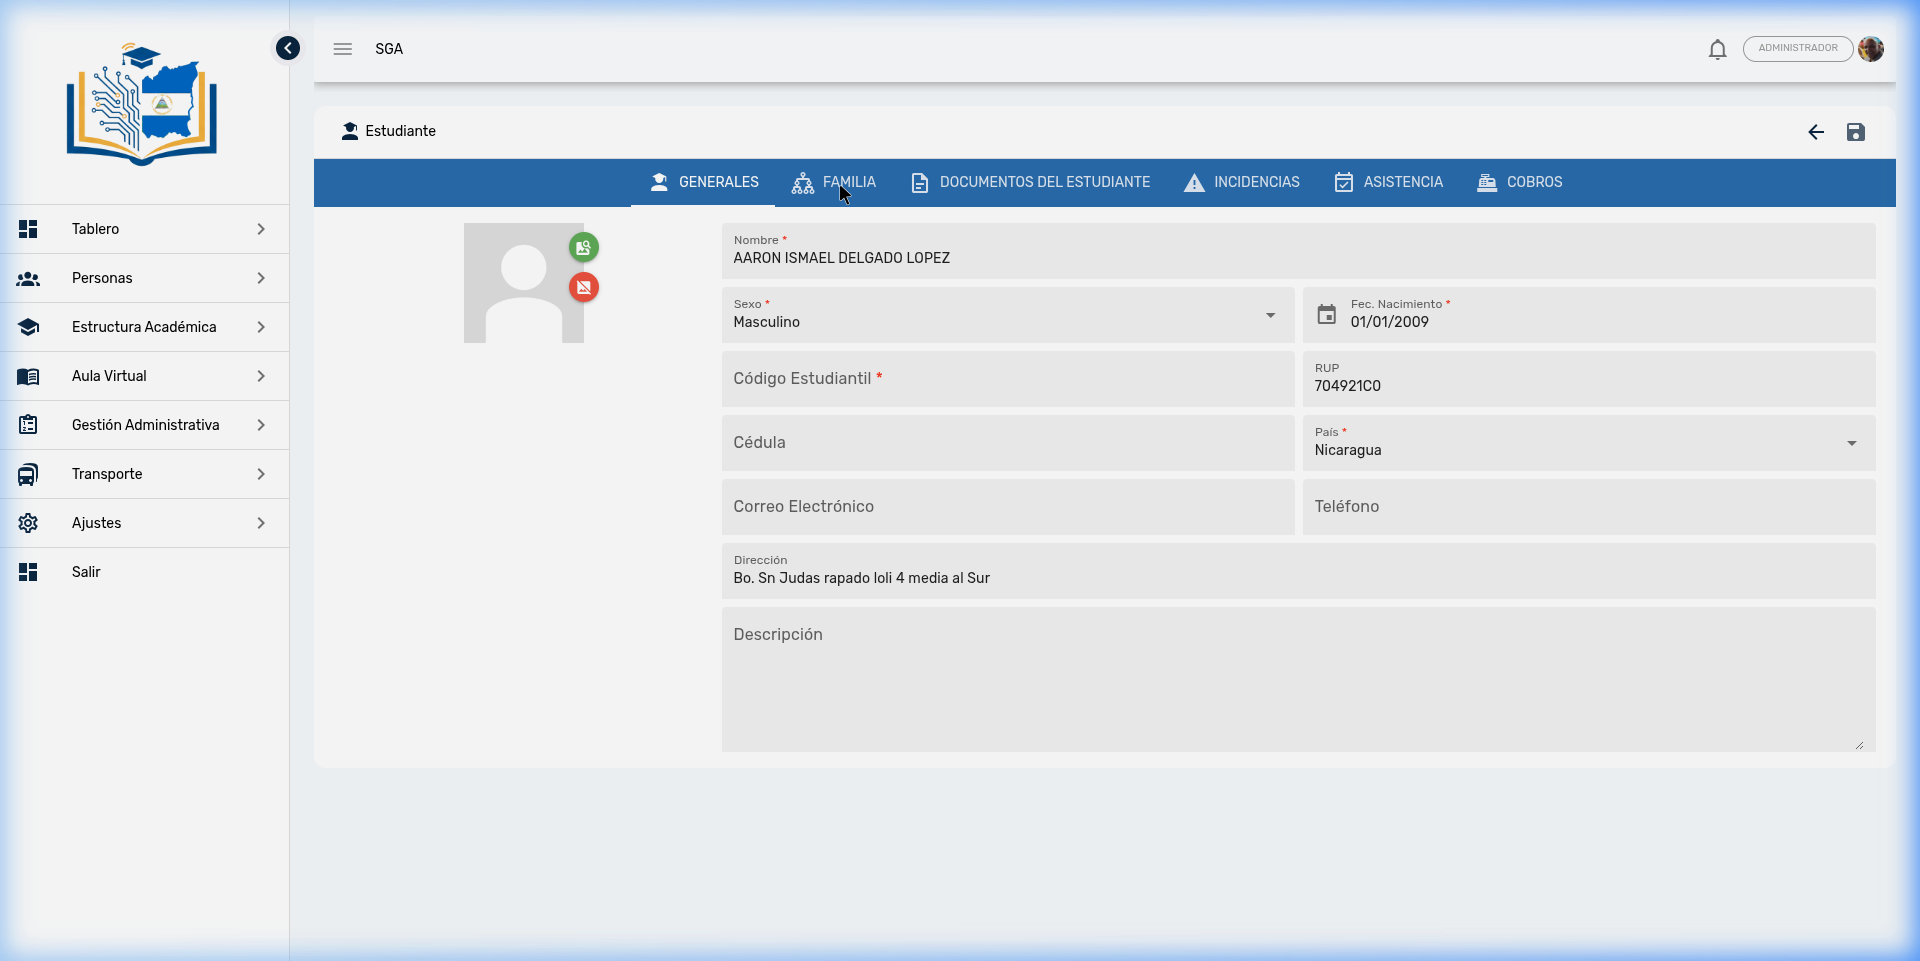
| Field | Description | Required |
|---|---|---|
| Photo | Student photograph. When you select an image, a crop editor opens with rotation and zoom tools to adjust the photo to a square format | No |
| Name | Student's full name | ✅ |
| Sex | Male or Female | ✅ |
| Date of Birth | Date of birth | ✅ |
| Student Code | Internal identifier assigned by the school | No |
| RUP | Unique Participant Registry (MINED) | No |
| ID Number | National identification number | No |
| Country | Country of nationality | ✅ |
| Student or family email | No | |
| Phone | Contact number | No |
| Address | Home address | No |
| Description | Additional notes or special conditions | No |
Photo editor
When uploading a photograph, the system opens an editor where you can crop, rotate (5° or 90°), and zoom the image before saving. The photo is cropped in a square format for the ID card and student profile.
If the student has a registered email, the system will automatically send them a welcome email when saving the profile for the first time.
4.2 Tab: Family
Allows you to register and manage the student's guardians (father, mother, or other responsible parties). A student can have multiple guardians, and a guardian can be linked to multiple students.
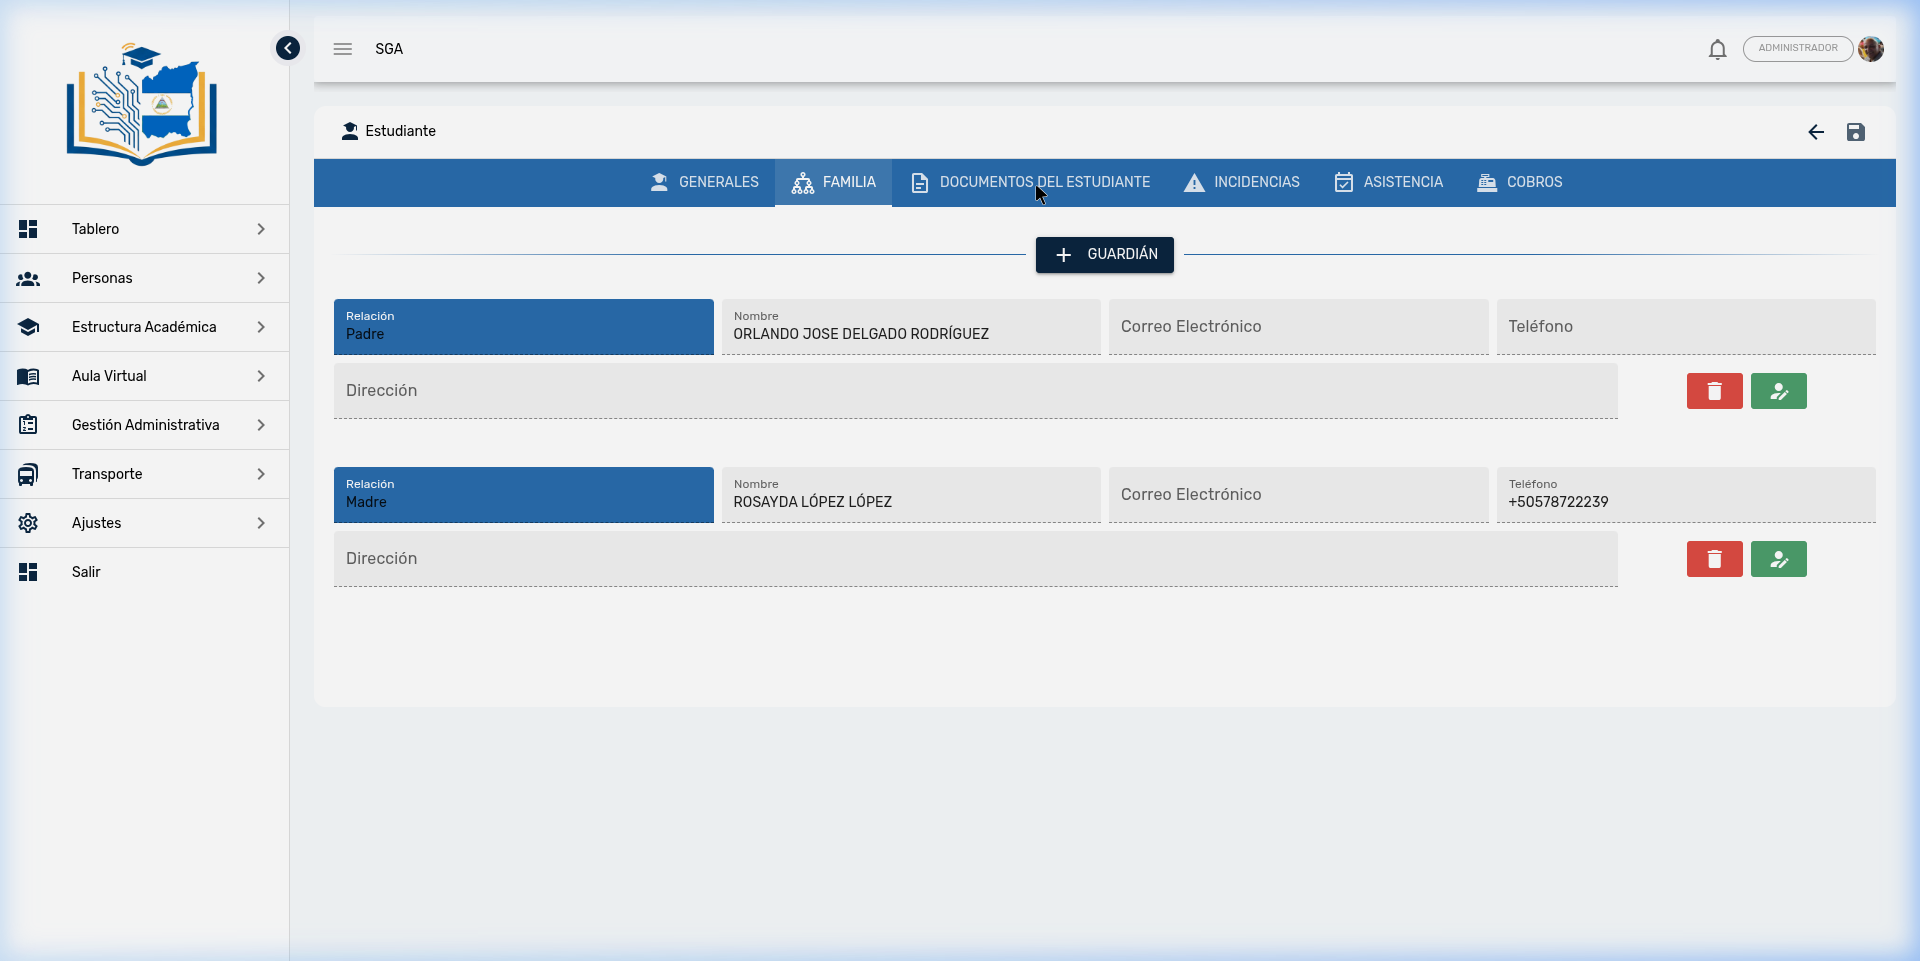
Available functions:
- Add Guardian: Click the + GUARDIAN button to link a new guardian. The system lets you search for an existing guardian and select the relationship type.
- Edit: Use the green button (🔧) to modify a guardian's data
- Remove link: Use the red button (🗑️) to unlink the guardian from the student
Guardian data:
| Field | Description |
|---|---|
| Relationship | Relationship type: Father, Mother, Guardian, Grandparent, Uncle/Aunt, etc. |
| Name | Guardian's full name |
| Email for receiving school notifications | |
| Phone | Direct contact number |
| Address | Guardian's address |
Note
The guardians registered here are those who will be able to access the Parent Portal to view grades, attendance, payments, schedules, documents, incidents, and transportation for their children. If a guardian has multiple children, they can select the student from a selector in the portal.
Unique link
The same guardian cannot be linked twice to the same student. If you need to change the relationship type, first remove the link and recreate it with the correct relationship.
4.3 Tab: Student Documents
Space to store digitized student documents in the cloud. Files are stored securely and are available from any device.
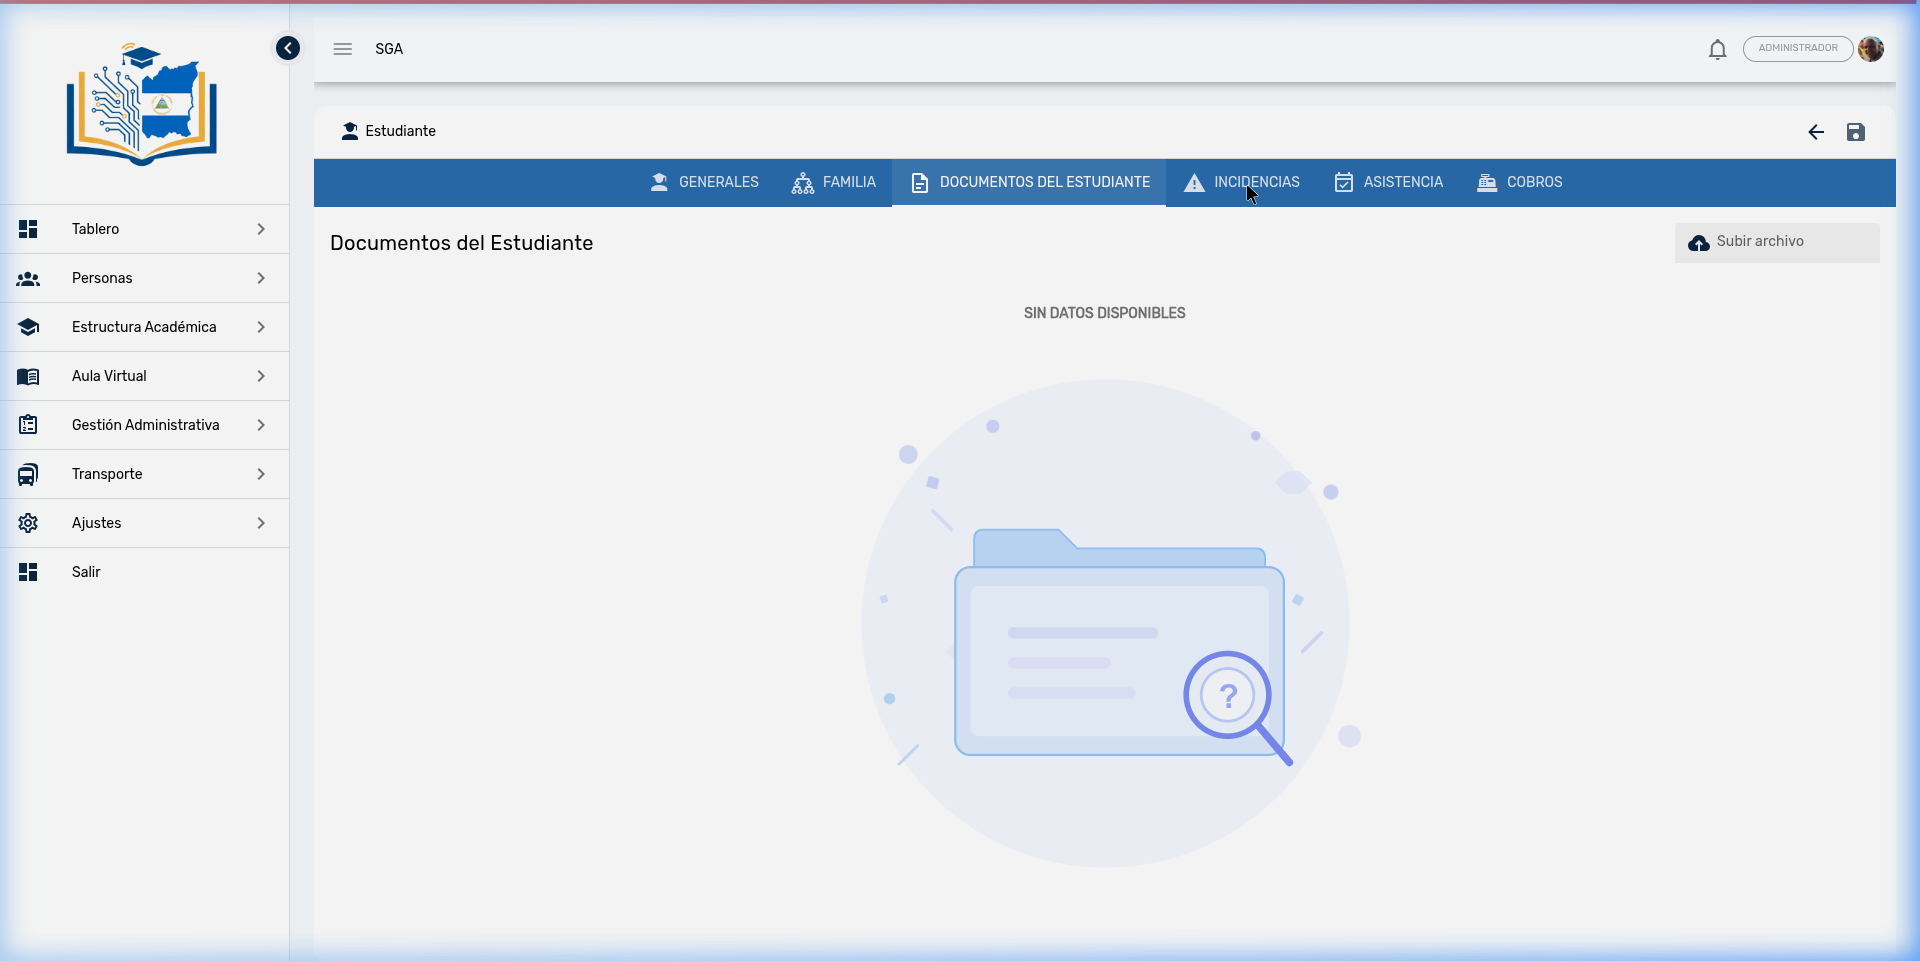
How to upload a document:
- Click the Upload file button (upper right corner)
- Select the file from your computer (PDF, image, Word, etc.)
- The document will be registered and available for later reference
Actions per document:
| Action | Description |
|---|---|
| Download | Downloads the file to your computer |
| Delete | Removes the document from the cloud (with confirmation) |
Information visible per file:
- Icon based on file type (PDF, image, document, etc.)
- File name
- Size
- Upload date
Tip
Use this section to maintain an organized digital file for each student, especially the documents required by MINED during inspections: birth certificate, medical certificates, previous transcripts, etc.
Access from the Parent Portal
Documents uploaded here are also visible to the student's guardians from the Parent Portal → Documents.
4.4 Tab: Incidents
Shows the student's disciplinary history. All reported incidents with their details appear here.
Information per record:
| Field | Description |
|---|---|
| School Year | Academic period |
| Section | Student's group |
| Course | Subject where the incident occurred |
| Date | Day of the event |
| Status | Incident status (with color badge) |
| Created by | Teacher who recorded the incident |
| Description | Detail of what happened |
Read-only
Incidents are recorded from the Virtual Classroom → Incidents module. This tab is read-only and serves to provide a quick view of the student's behavior.
4.5 Tab: Attendance
Presents a detailed record of the student's attendance, showing each event as an individual card:
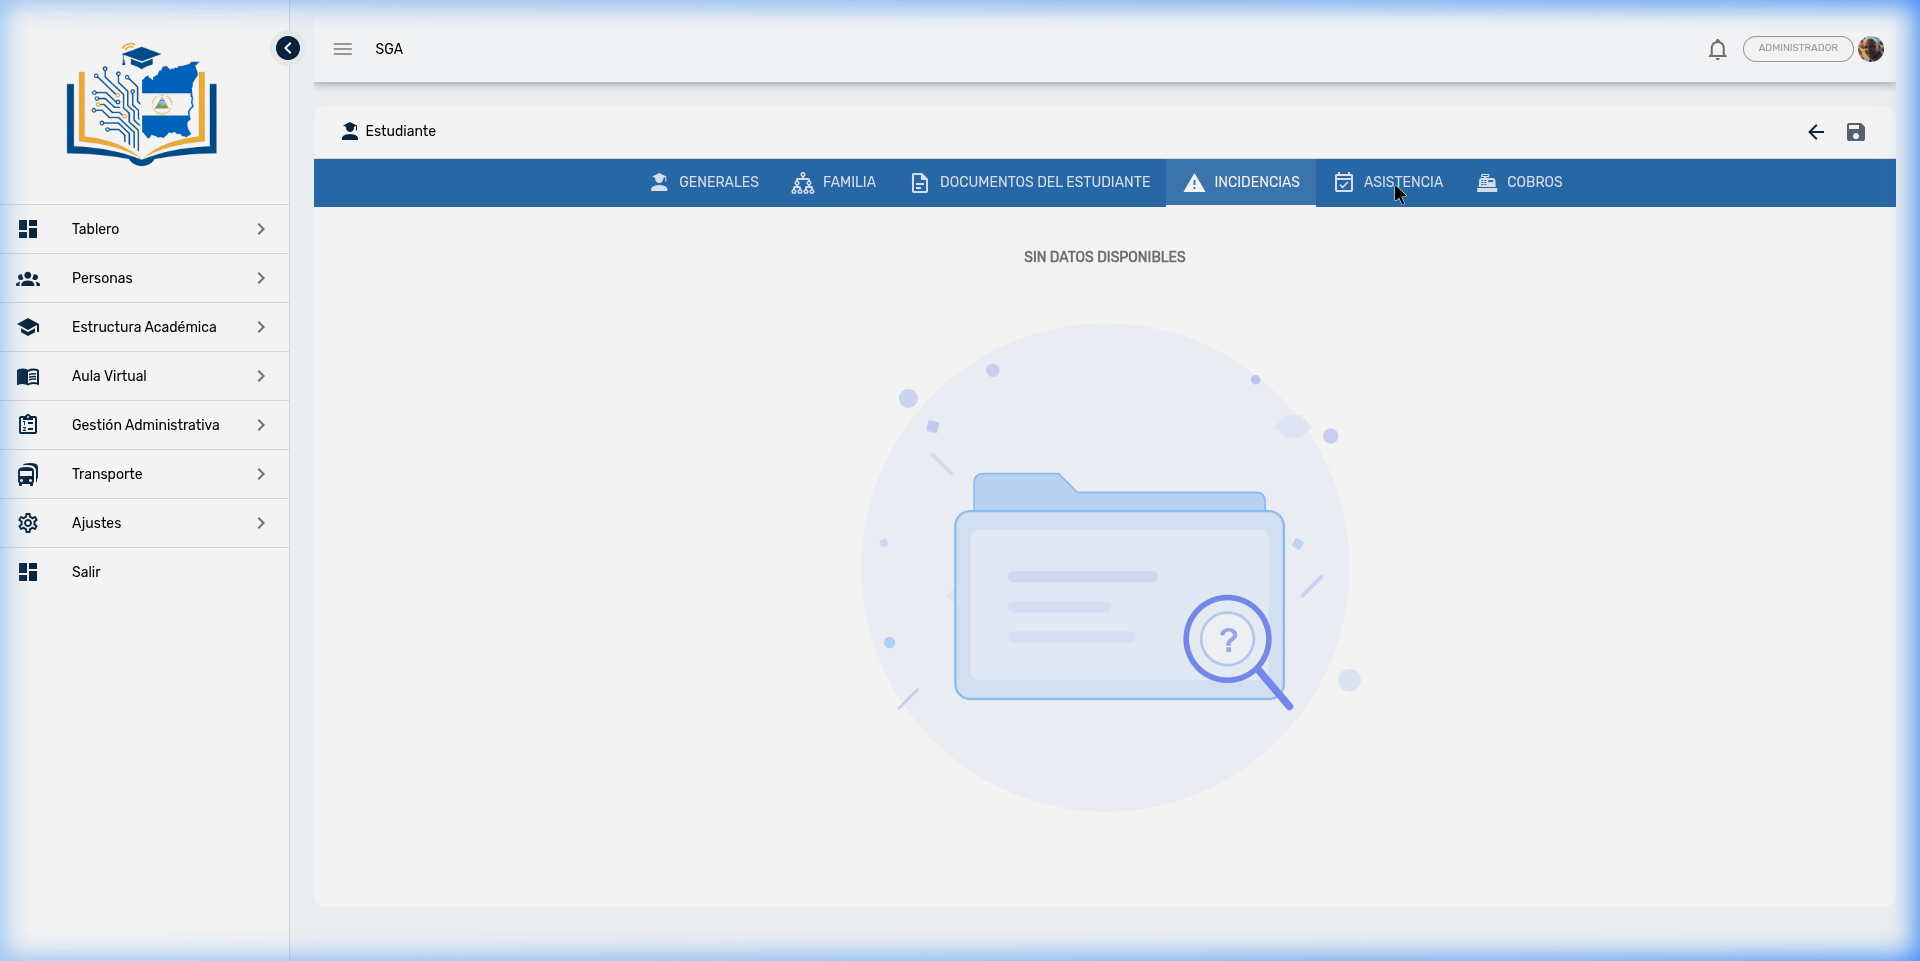
Information per record:
| Field | Description |
|---|---|
| School Year | Corresponding academic period |
| Section | Student's group or classroom |
| Course | Subject where attendance was recorded |
| Date | Exact day of the event |
| Status | Record type: Absence, Late Arrival, Excused |
| Created by | Teacher or administrator who recorded the attendance |
Tip
This tab allows you to see a student's attendance pattern at a glance without needing to go to the Attendance module. It is especially useful during parent-teacher meetings.
4.6 Tab: Academic History
Shows a timeline of the student's academic journey over the years. Each record represents an enrollment in a school year.
Information per record:
| Field | Description |
|---|---|
| School Year | Academic period (e.g., 2024-2025, 2025-2026) |
| Date | Enrollment date |
| Level | Educational level (Preschool, Primary, Secondary) |
| Grade | Grade completed (e.g., 3rd Level, 5th Grade, 9th Grade) |
| Section | Assigned group (e.g., A, B, C) |
| Classroom | Assigned classroom |
| Teacher | Homeroom teacher or group advisor |
| Status | Enrollment status (with color badge: Active, Suspended, Withdrawn, etc.) |
Academic traceability
This tab allows you to quickly see how many years the student has been at the institution, which grades they have gone through, and the status of each enrollment. It is especially useful for verifying academic progression during admission processes or transcript requests.
4.7 Tab: Billing
Shows the student's financial status: pending charges, payments made, and transaction history.
Read-only
Charges are managed from the Administrative Management → Cashier → Billing module. This tab shows a summary of the student's financial situation for quick reference.
5. Student ID Card
The system automatically generates a student ID card (credential) for each student. This card includes all the information needed to identify the student.
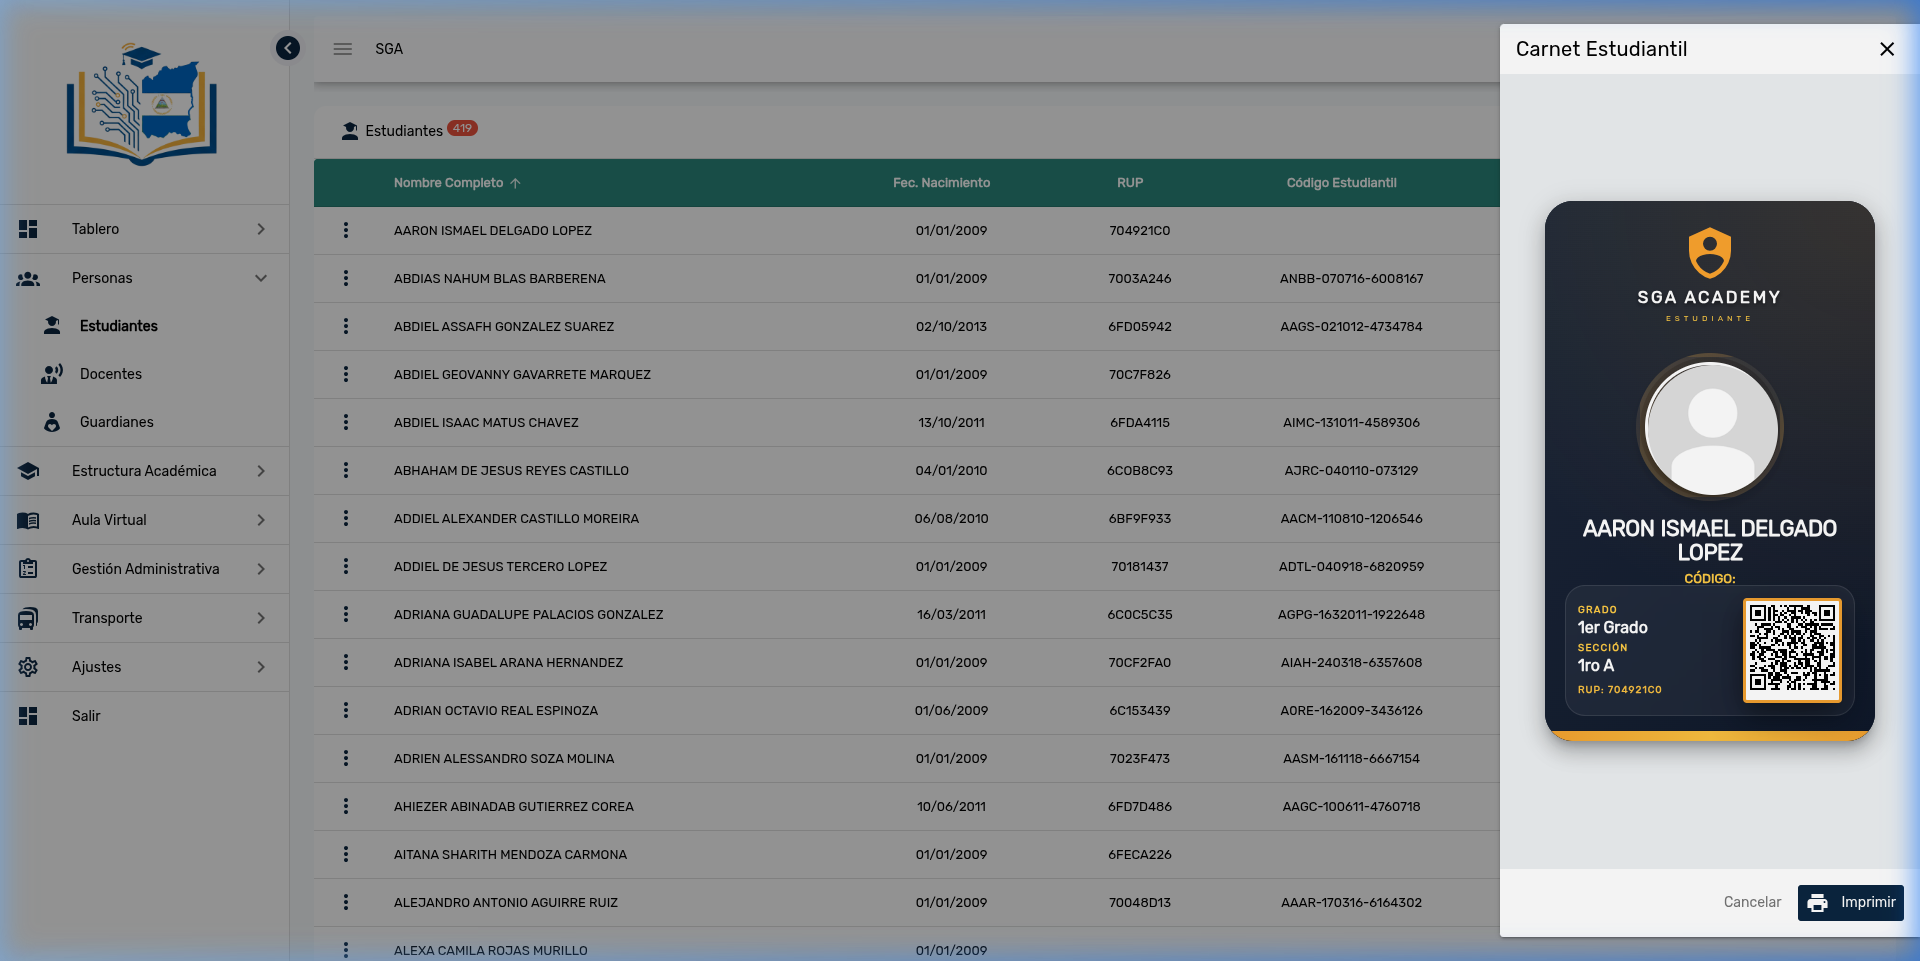
ID card elements:
- 🏫 School logo and institution name
- 📸 Student photograph
- 📝 Student's full name
- 🎓 Current grade and section
- 🔢 Student code
- 📋 RUP (Unique Participant Registry)
- 📱 Unique QR code for digital verification
How to print the ID card:
- In the student list, click the three dots (⋮) for the student
- Select the ID Card option
- A preview of the ID card will open
- The system will automatically open the print dialog
Tip
For a professional-quality ID card, it is recommended to use PVC or laminated card stock. The QR code contains the student's identification data and allows digital identity verification.
6. Student Record
The Student Record is a comprehensive view that consolidates all of the student's academic information on a single screen: grades, attendance, and incidents.
Access: Side menu → Virtual Classroom → Student Record
Filters
| Filter | Description |
|---|---|
| School Year | Period to query |
| Section | Grade and group |
| Student | Selector with name search |
| Period | Evaluation term (optional — if omitted, shows annual consolidated) |
Key Performance Indicators (KPIs)
The top section shows three cards with student metrics:
| Indicator | Description |
|---|---|
| Attendance Rate | Student's attendance percentage |
| Total Incidents | Number of recorded incidents |
| Overall Average | Grade average (for quantitative courses only) |
Record sub-tabs
Grades
- With period selected: Table with each evaluation for the period and its results
- Without period (consolidated): Multi-period view with each subject's result per evaluation term and the final year result
Attendance
- Table with: date, subject, status (with color badges)
- Summary with counters: present, absent, excused, late
Incidents
- Table with: date, subject, description, and status
Printing the record
The record can be printed from the print button. A document is generated with the school letterhead and all of the student's information.
7. Registering a New Student
To add a new student to the system:
- Click the + button (upper right corner of the list)
- Complete the required fields in the General tab (name, sex, date of birth, country)
- Optionally, upload a photo and adjust it with the crop editor
- Add guardians in the Family tab
- Optionally upload the student's documents
- Click the save icon (💾) in the upper right corner
Important
Before registering a new student, verify they don't already exist in the system using the search tool. This prevents duplicate records.
8. Navigation Summary
| Element | Location | Function |
|---|---|---|
| 🔍 Magnifying glass | Upper right corner | Search for students |
| ➕ More | Upper right corner | Register a new student |
| ⋮ Three dots | Beginning of each row | Actions: ID Card, Edit, Delete |
| ← Arrow | Upper right corner | Return to the list |
| 💾 Save | Upper right corner | Save changes to the profile |
| Tabs | Top bar | Navigate between the 7 profile sections |
Frequently Asked Questions
| Question | Answer |
|---|---|
| Can I delete a student? | Only if they have no enrollments, grades, attendance records, or charges linked. If they were registered by mistake and have no data, you can delete them. |
| How do I withdraw a student who is leaving? | Do not delete the record. Change their enrollment status to "Withdrawn" from the Enrollments module. This preserves their academic history. |
| What format should the photo be in? | PNG or JPG format. When uploaded, an editor will open to crop and adjust it to a square format. |
| Can parents see the student's documents? | Yes. Documents uploaded in the Documents tab are visible to guardians from the Parent Portal. |
| What does the QR code on the ID card contain? | It contains the student's identification data (code and RUP) for digital verification. |
| Can a guardian be linked to multiple students? | Yes. A guardian can be a tutor for multiple students. In the Parent Portal, they can select which child they want to view. |
| Where do I see the student's complete record? | From Virtual Classroom → Student Record. There you'll find consolidated grades, attendance, and incidents with indicators. |
| What is the Academic History? | It is the tab that shows a timeline with all of the student's enrollments over the years: grades completed, sections, teachers, and statuses. |
| Is any email sent when registering a student? | Yes, if the student has a registered email, the system automatically sends a welcome email. |